Showing posts with label free pattern. Show all posts

Friday, October 14, 2011

Nordland Morning Mist Cowl Pattern


Jesus replied, "Anyone who drinks this water will soon become thirsty again.  But those who drink the water I give will never be thirsty again.  It becomes a fresh, bubbling spring within them, giving them eternal life."
John 4:13-14
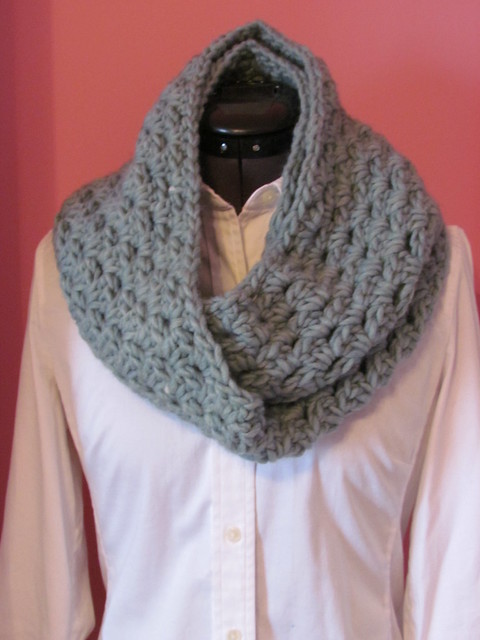
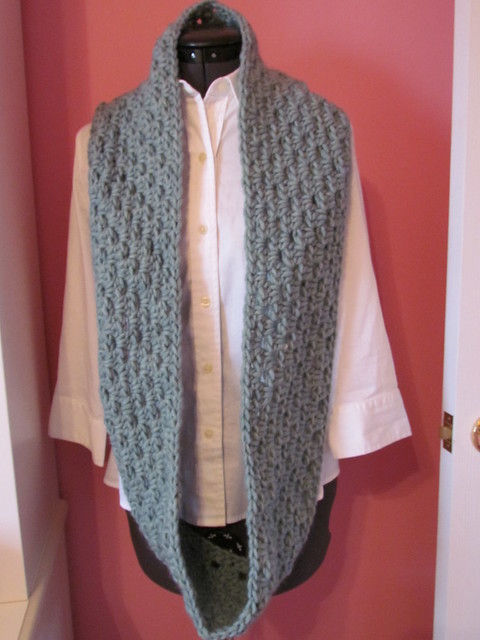
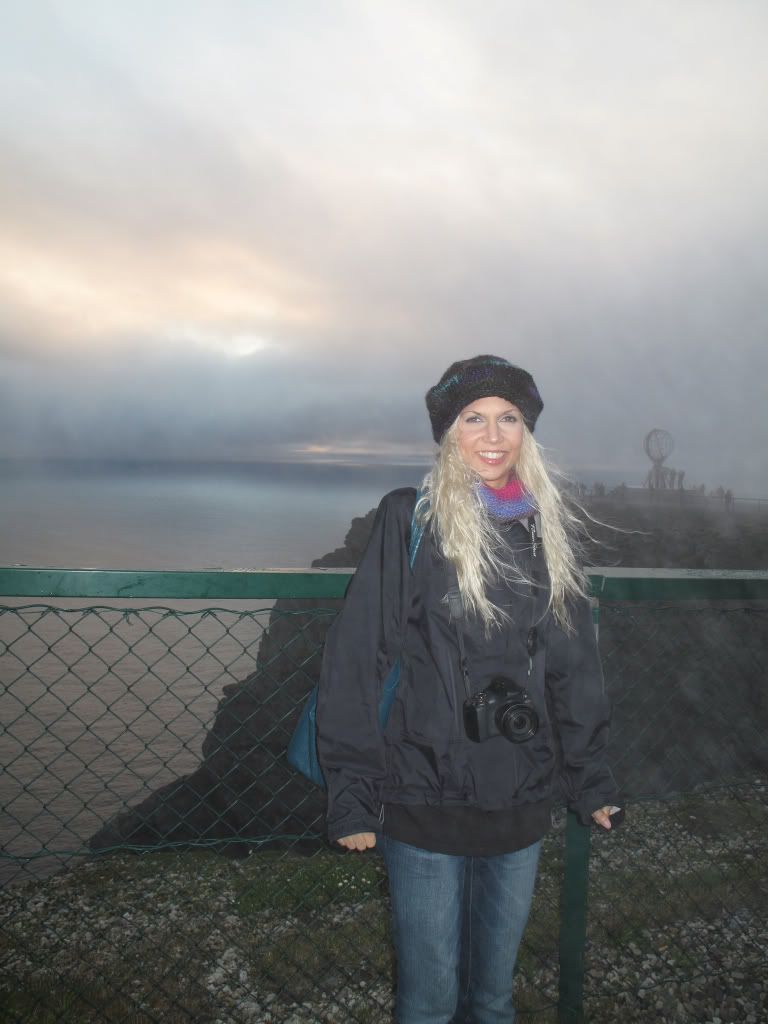
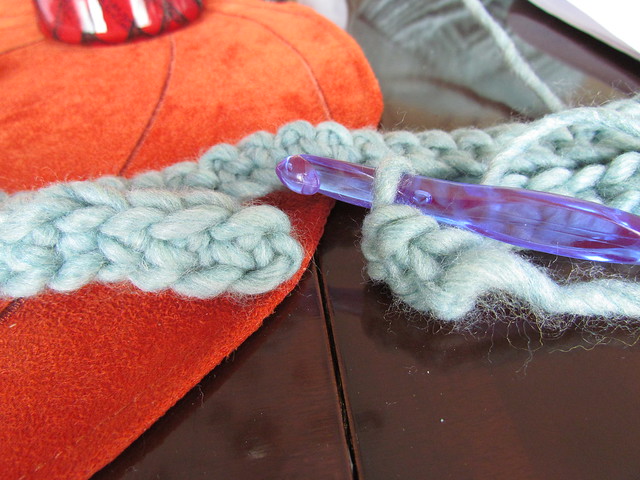
This cowl's inspiration came from the colour of the glacier water I seen while in Norway.  We were in an area called Nordland, where the river was the most gorgeous colour of light blue/green, which we were told was due to the high amount of minerals from the glaciers that melted into the river.  When we were there the mornings were a bit misty and cool, so this cowl would have been just the thing to wrap around my neck.  It's easy and quick to stitch, making it a perfect thing for a last-minute gift too!! 


Yarn
2 balls Bernat Roving (80% Acrylic/20% Wool; 100g/3.5 oz.; 120yds/109m) - Low Tide

Hook
M (9mm)

Supplies
Yarn needle
Measuring tape

Abbreviations
ch - Chain
dc - Double crochet
sc - Single crochet
st - Stitch

Pattern:

Ch 129 (or until the chain length is 45" long with the total number being a multiple of three).

Working into the back loop.
Row 1: Working into back loops of chain, 1 sc in each stitch to end.

Join the two ends together with a slip stitch.
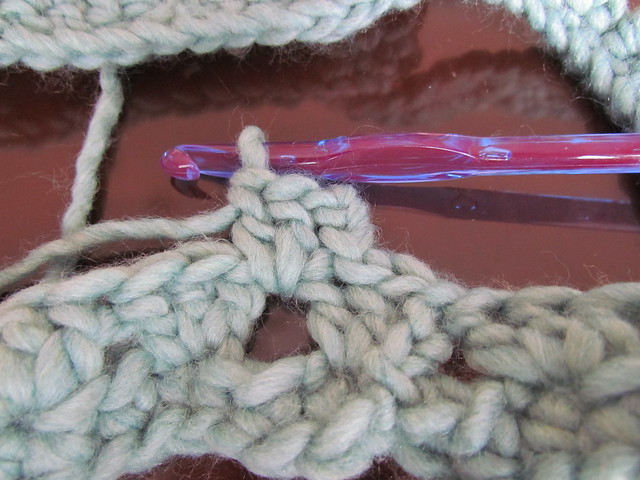
Row 2: Slip stitch into first stitch at other end of chain to join into a ring, being careful not to twist the chain.  Ch 3, 2 dc into same stitch as ch 3, *sk 2 sts, 3 dc into next st, repeat from* to end.  Slip stitch into top of ch 3 from beginning of round.

Slip stitch to the first space.

ch 3 and 2 dc to make the first cluster.
Row 3: Slip stitch across to first space, ch 3, 2 dc into space, 3 dc into each space to end.  Join round with a slip stitch into top of ch 3, as in round 2.
Repeat row 3 until your cowl is as wide as you'd like or until you run out of yarn.  Mine measures 6 1/2" wide.  Fasten off and weave in ends.  Wrap around your neck and enjoy!! 


Designed By
Armida Joy

Disclaimer:  This pattern is for personal and gift use only and may not be sold in paper or crocheted form.  Selling the item for charity or fundraising purposes with all proceeds going to the charity is always welcome.  Thank you!!

Wednesday, October 12, 2011

North Cape Shawlette Pattern


"Trust the Lord with all your heart, and lean not on your own understanding;
In all your ways acknowledge Him, and He will direct your paths."
Proverbs 3:5-6

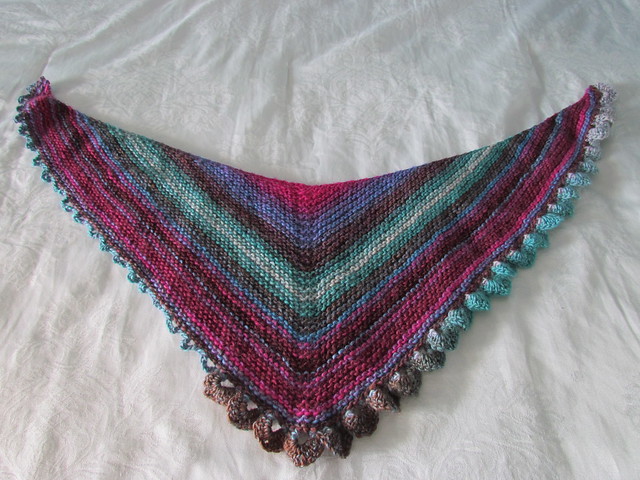
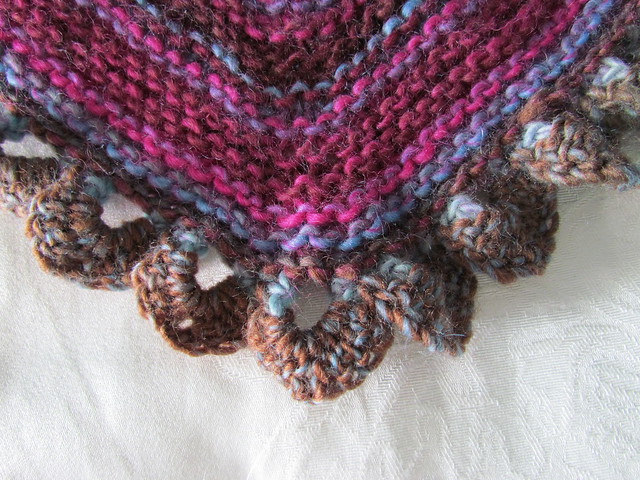
This shawlette was part of a KAL I did here on the blog over the summer while I was on a trip of Scandinavia.  The "main event" was getting to see the midnight sun from the most northern part of Europe, hence the name.  The pattern is more like a recipe of sorts so you can use the yarn you'd like and make it as big or small as you wish.  I thought I'd put it all together on one page for easy access and printability.  It will also be listed on My Designs page.   

Supplies

Yarn: Wisdom Yarns Poems (100% Wool; 50g/1.75oz; 100m/109yds per ball), 2 balls in your selected colourway (I'm using #589)  - This yarn is worsted weight and has long colour repeats similar to Noro, but you can substitute any type of yarn you would like.  I think this would look great in a solid colour as well.

Needles: US 11 (8mm) 40" circulars - or any size/length that works for you.  *Note: I'm a tight knitter, so I went up to the US 11 to make sure that I would get a nice drape to the fabric.  (The yarn I'm using calls for a US 8 (5mm) needle to get a guage of 18 sts x 23 rows = 4" in stockinette stitch.)  Choose any size of needle that will give you the fabric you want for your shawlette.  I suggest doing a little test swatch with a few different sizes of needles to see which you like best.  I also chose to use a 40" length because I didn't want my stitches all bunched up on the cable and I wanted to be able to see how the shape is progressing as I knit.  Feel free to use whatever length of cable you are comfortable working with.

Guage: There is none!!  This shawlette is completely for you to customize!!  You can knit it to be as tight and cozy, or as loose and drapey as you like.

Tools: stitch markers, yarn needle, scissors, tape measure, and crochet hook size K (6.5mm).     
Abbreviations:k - knit
kfb - knit into the front and the back of the stitch
pm - place marker
sm - slip marker
st(s) - stitch(es)
Pattern

Cast on 3 sts

Row 1: kfb, k1, kfb = 5 sts.

Row 2: K across.

Row 3: (kfb) twice, k1, (kfb) twice = 9 sts.

Row 4: K across.

Row 5: (kfb) twice, k1, kfb, pm, k1, pm, kfb, k1, (kfb) twice = 15 sts.

Row 6: K across.

Row 7: (kfb) twice, knit to 1 st before marker, kfb, sm, k1, sm, kfb, k to last 2 sts, (kfb) twice.

Repeat Rows 6 and 7 until the shawl is your desired size.  Keep in mind that you will need a fair amount of yarn for the edging since it is crochet and crochet uses more yarn than knitting does, so make sure to leave enough yarn for it.  (I say this because I ran out of yarn and it just doesn't look good that way....)

Once your shawlette is the size you want, bind off loosely leaving the last loop on the needle.


Edging:

Crochet hook: K (6.5 mm)

Abbreviations:Ch - chain
Sc - single crochet
Skp - skip
St(s) - stitch(es)
Dc - double crochet
Transfer the last loop on the needle to your crochet hook and turn the work so you will be crocheting through the stitches you just bound off.

Row 1: ch 1, sc in next 2 sts, *ch 5, sk 1, 3 sc* repeat to last 3 sts; ch 5, sk 1, 2sc. (If you don't have the exact amount of stitches at the end, that's ok.  I had to do a little fudging by skipping 2 instead of 1 at the end before the last two sc.  It really doesn't show or make much difference.)

Row 2: ch 1, sc 1, *(4 dc, ch 2, 4 dc) in ch-5 space, sc in central sc of 3 sc*, repeat till last sc, sc in last stitch.

Bind off and weave in ends.  Enjoy!!


If you'd like to read about how this design came about, you can read here, here,  here, and here.

Disclaimer: This pattern is for personal and gift use only and may not be sold in paper or knitted form.  Selling the item for charity or fundraising purposes with all proceeds going to the charity is always welcome.  Thank you!!

Designed By:
Armida Joy

Wednesday, July 6, 2011

KAL Shawlette Edge Pattern

Hello!

I'm finally back with the edge pattern for the shawlette! I'm sorry for the delay, we didn't have Internet access for a few days, but now that we are heading back southwards, we should have it at each hotel....at least I hope so. We are now in Alta, Norway and it is such a beautiful country! We have been seeing lots of fjords and mountains, which are my favourite!! I'm so excited to see more of this country.

I did (almost) finish my shawlette in time to wear at the North Cape last night! I say almost because I ran out of yarn when doing the edge. I was too lazy to take it out to where I could make it work, so I just left it half finished and wore it as it was. I'm very happy with how it turned out and it was just the thing I needed to keep my neck warm in the cold, midnight wind up there. Mom took a few pictures that I will hopefully add to the same photobucket album as before, either tonight or tomorrow. I also whipped up a crochet hat last evening because the weather ended up being a lot colder than I was expecting and I wanted to protect my ears. Plus, I was too cheep to buy one from the souvinere shop! Ok, enough rambling, here is the pattern.

KAL Shawlette Edge Pattern

Crochet hook: K (6.5 mm)

Abbreviations:
Ch - chain
Sc - single crochet
Skp - skip
St(s) - stitch(es)
Dc - double crochet

After binding off, leave the last loop on you needle. Transfer it to your crochet hook and turn the work so you will be crocheting through the stitches you just bound off.

Row 1: ch 1, sc in next 2 sts, *ch 5, sk 1, 3 sc* repeat to last 3 sts; ch 5, sk 1, 2sc. (since I was working on this while on the bus, I didnt have the ability to figure out how to make my amount of stitches to match this pattern as planned, I think I was off a stitch somewhere, but I just fudged it to make it work by skipping an extra stitch and it worked out fine, so if you have this problem too, you can do that as well until I can figure it out).

Row 2: ch 1, sc 1, *(4 dc, ch 2, 4 dc) in ch-5 space, sc in central sc of 3 sc*, repeat till last sc, sc in last stitch.

Bind off and weave in ends.

I hope this makes sense! I can't wait to see all of your shawlettes!!

Much Love, xx

Tuesday, January 4, 2011

Some Christmas FOs

Hello Knitters,

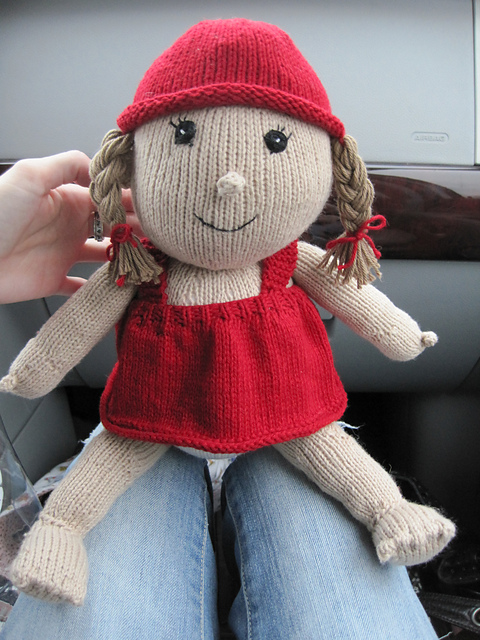
There are still a few FOs that were Christmas gifts I haven't shared yet on the blog.  The first one is the Baby Doll Set from Itty-Bitty Toys.  She was a bigger project to make, but so worth it!  I made her for my cousin's daughter C and she loves her :-D  Nothing makes a knitter happier than to know her handknits are well loved and enjoyed.  I used Knit Picks CotLin and made her a red Christmas dress and hat.  Here are a few pictures:


My Mom did all the seaming and the face since I was in a bit of a rush to get her finished, that's why she looks so cute!  :-) There are more pictures and info on my Ravelry project page.

Another Christmas gift was Darling.  It's a cowl pattern I designed for my sister.  She has a very classic style so I wanted something that would go well with her wardrobe and would be something she'd want to wear.  This pattern was the result.  It's a super quick and easy knit.  I used Tahki Yarns Tornio in black, which is an awesome yarn with a good squish to it.  You can find the free pattern on my sidebar if you're interested in making one of your own.  I released it on Ravelry just before Christmas, but didn't mention it on here since I didn't want to ruin the surprise for my sister.  Here's a couple pictures:


These are some little amigurumi food that I crocheted for my dietitian.  I thought she'd find them cute :-)


And lastly, this is a flower broach I crocheted for a gift.  My Mom thought it would look nice with crystal in the center to make it sparkle.  The picture isn't the best because I took it at night before I gave it away.  It was super fast to make. 


I also knit my Mom a cute neck warmer, but I have to get a picture of her wearing it still.  All in all, I think my Christmas knitting went very well.  There are a couple of things that didn't get finished, but that's ok.  My plan for this year is to have everyone's gifts all done (or mostly) well before December.  We'll see how that goes I guess, but it is a plan :-)  Have a great Tuesday everyone!

Happy Knitting!!

Saturday, November 6, 2010

Ritzy Stable Mitts


Hello Knitters,

I finally wrote up the pattern for the fingerless mitts I made back at the end of summer.  I named them 'Ritzy Stable Mitts' since they remind me of something you'd wear out to the stable to check on your horse.  They're not really what you'd wear while riding, but they'd be just the thing to take off that morning chill on your way to the barn.  At least that's the way I dream of wearing them!

They're also great for us non-equestrian types to slip on during the cool fall months.  The yarn has a bit of cashmere in it, making them a little treat for your hands.  And probably the best part of all, at least in my books, is that they are super quick to make so they come in real handy for holiday gifts!   


You can find more information on the yarn, needles, etc and the pdf download here on the Ravelry page. 

Happy Knitting!!

Monday, May 31, 2010

A Pattern, a Prom, a New House and a New Project

Hello Knitters,

Happy Memorial Day to all you Americans out there! I hope everyone is having a lovely weekend full of fun with family and friends and lots great weather! Today it's a bit rainy looking and much cooler than it has been for quite a while, but that's alright with me, we desperately need the rain here. The wind just picked up and I can smell rain in the air, so I'm pretty sure it will rain soon.

I do have a little something for you my dear blog readers. If you look on my sidebar under "My Free Knitting Patterns" you should see a spot where it says "Fairytale Knee Socks Pattern" that is the pattern I wrote up over the weekend for the knee socks I made a while back. It's a super easy toe-up pattern and you don't have to make them knee socks if you don't want either, you can end the sock at whatever height you'd like. I hope you all enjoy that pattern, I know I had fun knitting them! If you find any errors in the pattern please contact me and let me know since I wrote it up a while after I actually knit the socks. I used Knit Picks Imagination yarn which you can substitute with any sock yarn you would like to use, however, I thought I should mention that there are five new colours of Imagination that came out last week, so there's a very nice selection of colours. Click here for the Ravelry page for the Fairytale Knee Socks!

I do have a few things to catch everyone up on. I wanted to blog for the last so many days but all sorts of things have kept me busy so I didn't have time. First off, during the middle of the week my Aunt asked me if I would like to make a corsage with silk flowers for my cousin's girlfriend. Their prom was on Saturday. I said yes and then got to work. Her dress was white and black so that was the theme. Here's the final outcome:


On the weekend we moved some of my sister's things into her new house. She is going to be moving in very soon once the appliances arrive and everything is ready. She said I could come and stay with her sometimes since she'll be the only one living there until after the wedding when her fiance (well he'll be her husband then) will move in. I think that would be a lot of fun. She's usually super busy with work and then by the time she drives the hour it takes her to get home, she ends up going right to bed, so we don't get to spend much time together. When she lives up there, she will be able to come home from work earlier so if I stayed up there sometimes, we'd get to hang out more. I'm actually looking forward to it. We haven't really hung out together much for the last eight years. She was away at school for 5 years and then when she came back home, she started working and has been busy ever since. It'd be really nice to be able to spend time with her these last few months before she's gets married and starts her new life. Her house has some very lovely flowerbeds and even a garden plot, which I'm very excited about. She also said they will have high-speed and even wireless, so I can blog much quicker! How cool will that be?!? We only have dial-up here, so it takes me forever to upload pictures and download things and just use the Internet in general.

For news on the knitting front, after finishing up some special knitting, I cast on for a new summer bag. The pattern is the Guernsey Style Bag from the Spring/Summer 2010 Debbie Bliss Magazine. The yarn I'm using is Debbie Bliss Eco Aran in red. I'm enjoying the pattern and yarn so far. I thought it was a perfect summer project.

I'm also still working on the rainbow socks for my Mom. I'm almost done the first sock, and then I need to start the second one. I really like how the stripes worked up, they're so pretty!
I haven't done anymore dyeing lately, but I do have some blue yarn I hope to share with you all soon. I just have to throw it into the wash to make sure all the dye is out.

Well, so much for my prediction of rain, the sun is back out and looks like it's going to be another nice day! I guess all that wind blew the storm clouds right away. I think I better stick to my knitting and not weather predicting! I hope you all have a great day!

Happy knitting!!

Thursday, February 4, 2010

Lovestruck


"There are three things that remain - faith, hope, and love - and the greatest of these is love."

1 Corinthians 13:13 NLT

Hello Knitters,

Since Valentine's Day is fast approaching I had to share with you this little pattern I made yesterday. It's super fast and easy which means you can whip one (or more!) up in plenty of time. I knit him out of worsted weight cotton, but you really could use any yarn and needles you would like to make him larger or smaller to suit your taste. Enjoy!


Lovestruck

Finished Measurements: 3 1/2 inches wide by about 3 1/2 inches tall

Materials

Yarn: Bernat Cottontots (100% cotton; 100 grams) or any worsted weight yarn would work - Country Pink
and small amounts of Bernat Cottontots - Wonder White and Lion Brand Cotton - Black (or just use any small amounts of worsted weight yarn for feet and hands)
Small amount of fiberfil

Needles: US 7 double-pointed needles

Tools: Yarn needle, scissors

Abbreviations:

k - knit

p - purl

m1 - make one by inserting the left needle from the front to the back under the bar in between the stich on the left needle and the stitch on the right needle and place the bar onto the right-hand needle. Knit this through the back loop.

k2tog - knit two together

psso - pass slipped stich over

sl - slip

ssk - slip two stitches separately as if to knit, knit these two stitches together through the back loops


Pattern

Heart Body (Make 2)

Using 2 double-pointed needles as straight needles, cast on 3 sts

(RS) Row 1: k1, m1, k1, m1, k1 = 5 sts

(WS) Row 2 and all even numbered rows: Purl

Row 3: k1, m1, k3, m1, k1 = 7 sts

Row 5: k1, m1, k5, m1, k1 = 9 sts

Row 6: Purl

cut yarn and leave on needle.

Using 2 other double-pointed needles, repeat the above so that you now have two pieces for the top of the heart.

Join the two pieces together by on row 7 of the current piece you are working on: k1, m1, k7, k2tog (do this by knitting the last stitch from the current piece together with the first stitch from the first piece), k7, m1, k1 = 16 sts total

Row 8: Purl

Row 9: Knit

Row 10: Purl

Row 11, 13, 15, 17, 19, 21, and 23: k, ssk, k to last 3 sts, k2tog, k1 - 2 sts will be decreased in each row. When completed row 23 you will have a total of 5 st.

Row 25: k1, sl, k2tog, psso, k1 = 3 sts

Row 27: sl, k2tog, psso = 1 st - cut yarn and thread through yarn needle and pull end through loop.
Weave in ends then take a piece of yarn and thread onto yarn needle. Whipstitch both pieces together, leaving a small space, stuff with fiberfil and finish sewing together.

Arms and Legs (make 4)

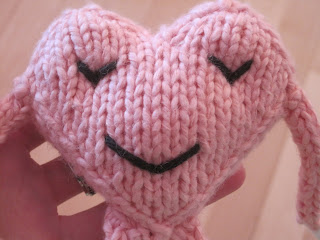
Cast on 4 sts and work i-cord for 2 1/2 inches - bind off. Sew onto body using the picture for a guide.

Feet (make 2)

With black yarn and two double-pointed needles used as straight needles cast on 6 sts

Rows 1-8: *k1, sl 1* repeat to the end of row

cut yarn leaving a 8 inch tail and thread through yarn needle. Take knitting needle out of stitches carefully and gently form a tube by squeezing slightly near the bottom of the piece. Draw tail through live stitches and then turn the piece inside out so the right side is facing outward. Gather the top tightly and stitch closed. Taking the tail end, sew the foot onto the end of the leg.

Hands (make 2)

With white yarn, follow instructions for feet, and when complete, sew onto ends of arms.


Face

With the black yarn threaded on yarn needle stitch on face using picture as guide.

Congratulations!! You are finished!! Now find someone who needs a little love in their life and pass him on!

Wednesday, December 16, 2009

Last-Minute: Waves of Grace Scarf

Hi Knitters,


I want to give you a little early Christmas present. I made this scarf for my sister's Christmas gift, and since I had so much fun making it, I thought you all might too! It's the perfect thing for that quick last-minute gift you need since it works up fast with bulky yarn on big needles, just what we knitters need this close to Christmas. The name came about because as I was knitting it, I went through some times when I needed waves of grace from Jesus. Now this is my first pattern I've ever written, so I'm sorry if there's any mistakes. I came across a cable pattern in an old book, and I'm not sure if this is exactly the same, but it's close. The instructions were vague, so I just made stuff up as I went along.


Waves of Grace Scarf


This pattern is for personal use only. Do not reproduce this pattern elsewhere.


Finished measurements: 6 inches wide by 54 inches long

Materials


Yarn: Sean Sheep Lilydale (90% Acrylic/10% Nylon; 75 grams/123 yards (or any bulky weight yarn would work) - 2 balls

Needles: US 13 (9mm)

Tools: cable needle, yarn needle, scissors

Abbreviations:


k knit

p purl

sl slip

Pattern


Cast on 26 sts.

*slip the first stitch of every row, this just makes a nice neat edge.

Row 1: knit

Row 2: purl

Row 3: make sure to slip the first stitch of this row also *sl next 3 sts on cable needle and leave at front of work, k3, k3 sts from cable needle, k6* repeat till 1st left, k1

Row 4: purl

Row 5: knit

Row 6: purl

Row 7: make sure to slip the first stitch of this row also *k6, sl next 3 sts on cable needle and leave at back of work, k3, k3 sts from cable needle* repeat till 1st left, k1

Row 8: purl

Row 9: knit

Row 10: purl


Repeat rows 3-10 until the scarf measures 54 inches long, or however long you want to make it. I just kept knitting until I used up most of the yarn. I bound off after row 10 by just turning to the next row and bound off in knit stitch, however, to make it look a bit better I would probably bind off in purl stitch on a row 10.

Well, that's it. I sure hope you all enjoy making this scarf, and please let me know what you think!

Merry Christmas!!